What’s a door level?

(And why you’ll never want to install a door without one again!)
In this article, we’re going to walk through what it takes to install a prehung door properly with clear bullet points to lead the way. We’ll also give a few tips and a tool at the end to make the process a lot easier. Follow along below, and please feel free to reach out to us with any questions that may come up – we’re here to help!
What’s the problem with using a traditional 6’ handheld level?
There’s nothing wrong with a good 6′ handheld level, but it can be cumbersome to use one for door installation.
Let’s start at the beginning – There are 4 key goals when you’re installing a door. Getting any one of these wrong can result with the door not working properly or even needing to be replaced due to warping.
A correctly installed door needs to be:
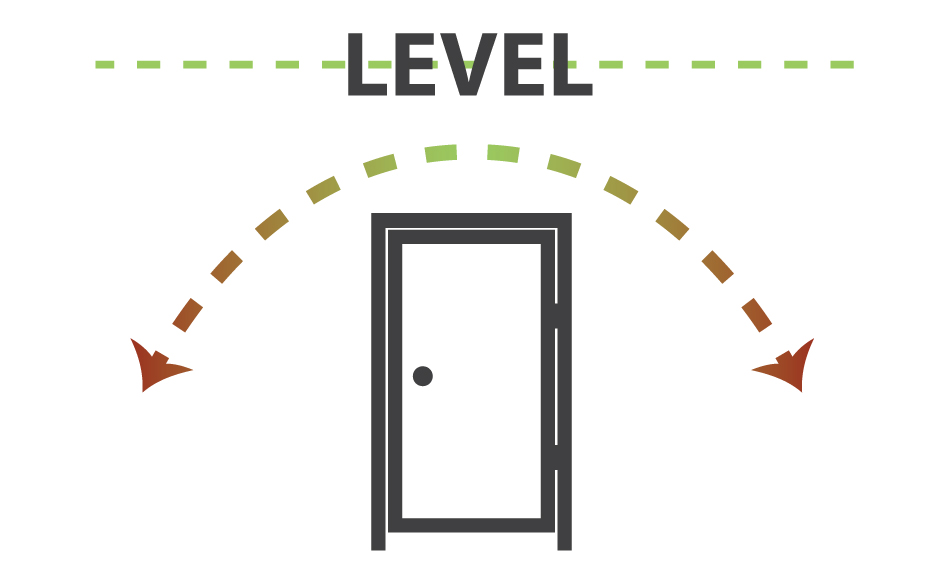
The best way to describe LEVEL is to imagine a straight line that is perfectly horizontal. Take a look at the picture above, the dotted green line represents LEVEL.
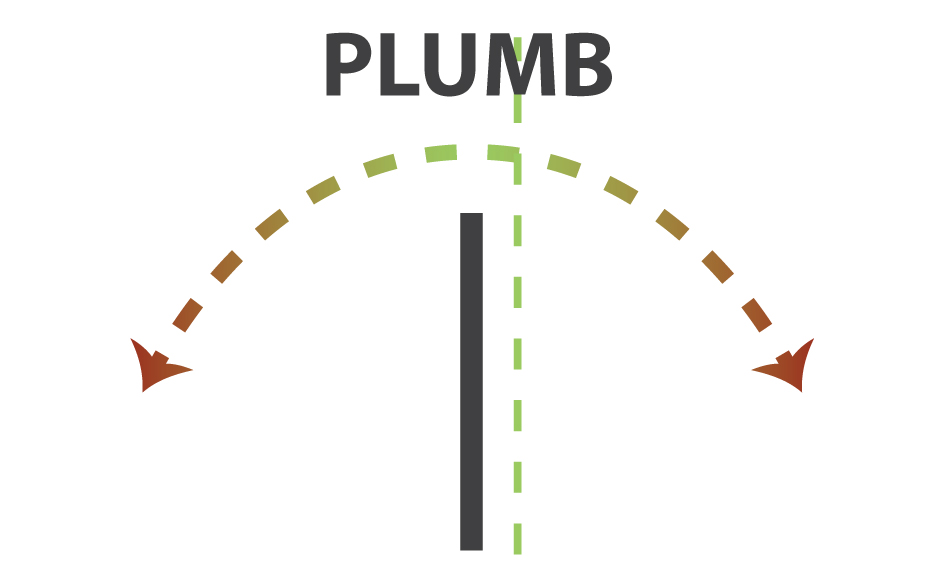
To visualize what PLUMB represents, look at the dashed green line above. PLUMB is the term used to refer to a perfectly vertical line.
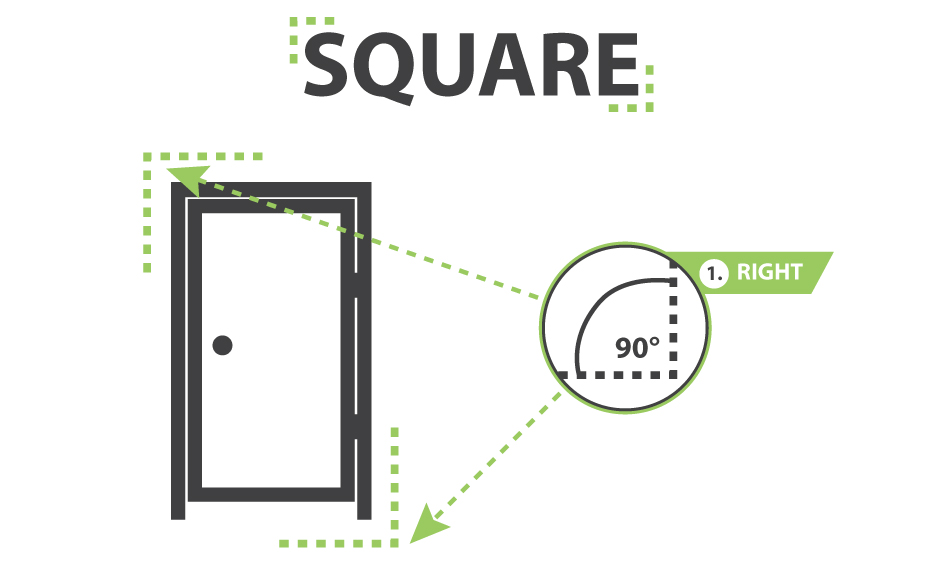
The definition of SQUARE is a 90 degree corner. A speed square, framing square, and T squares are all good examples of tools used to find SQUARE on a jobsite.

The picture above describes TRUE. A door or window can be installed perfectly LEVEL, PLUMB & SQUARE on one side, but if the other side’s aren’t LEVEL, PLUMB & SQUARE, the unit will not be TRUE.
The best way to describe LEVEL is to imagine a straight line that is perfectly horizontal. Take a look at the picture above, the dotted green line represents LEVEL.
To visualize what PLUMB represents, look at the dashed green line above. PLUMB is the term used to refer to a perfectly vertical line.
The definition of SQUARE is a 90 degree corner. A speed square, framing square, and T squares are all good examples of tools used to find SQUARE on a jobsite.
The picture above describes TRUE. A door or window can be installed perfectly LEVEL, PLUMB & SQUARE on one side, but if the other side’s aren’t LEVEL, PLUMB & SQUARE, the unit will not be TRUE.
While these concepts are easy to talk about and understand, it can be very hard to achieve all 4 at once during the actual door installation. (Click here if you want to learn more about Level, Plumb, True & Square)
Here are a few factors that make installing a door difficult –
- If you’re using a traditional 6’ level, you can only read Level or Plumb, not both at the same time. When you try to move the door into Level, you’ll often move it out of Plumb or visa versa. I’ve literally spent hours in the past trying to get a door right, only to end in frustration!
- The door slab is what needs to hang Level & Plumb. If it’s out either way, the weight of the door will cause it to swing open or closed on its own. You can probably think of a door in your house that does this – and now you know why. Too many people focus on the door jamb, but it’s the door slab that counts!
- The door jamb needs to be spaced consistently around the door slab – (precisely 3/32” on the strike and top sides & 1/16” on the hinge side.) Again, this is easy to say but can be very hard to do using a traditional 6’ handheld level.

Keep these tips in mind for your next door install:
- Starting with a level sill – The sill is the bottom of a door and it being level and flat is the corner stone of any good door installation. It’ very important that the floor space that the door is going to be sitting on is completely level and flat before starting on the door installation. If it’s not, you need to fix it! Here’s an article about how to level the floor using common building materials.
- Use screws, but don’t overtighten them – You’ll want to use screws, not nails when installing a prehung door. Nails will pull out over time with use, causing the door frame to move and not work correctly. Just be careful not to overtighten the screws. If you put too much torque on the screw, it will pull the jamb out of level or plumb and give you trouble. A nice positive connection holding the door shim is all you need.
- Shimming – Every door needs to be shimmed during installation. The shims create a firm hold between the door jamb and the wall. Shims are essential in preventing the door from moving over time. Here’s a whole article about properly shimming a door and the various shims on the market.

How does a door level make it easier?
If you haven’t heard of a door level – don’t worry, you’re not alone. It’s a fairly new innovation, but it can be a great time and frustration saver when it comes to installing a prehung door.
Here’s how a door level helps during installation –
- A door level attaches onto the door slab to show Level and Plumb at the same time – this frees up both of your hands to work. You can watch level and plumb change as you install the door, getting it perfect from start to finish.
- A door level also creates the proper spacing between the door slab and its frame. Acting as an assembly guide during the shimming process. Every door gets installed with the same consistent reveals – 3/32” on the strike and top sides & 1/16” on the hinge side.
- A door level helps to hold the door assembly true and square during installation. Its spacers help to prevent the door from racking back and forth by locking the door slab into its frame.

Where can you buy a door level?
You’ve come to the right place, JENTRA is the creator of the door level. We’ve used our same door installation knowledge from above to develop the CHEATAH door level. We’ve sold almost 10,000 CHEATAH door levels to date, so hurry up and get yours!
In stores – Here’s a map of local stores where you can purchase our CHEATAH door level. We are not currently in any of the large box stores.
Online store – Click here to purchase the CHEATAH door level from our online store.
Thanks for reading and please be sure to reach out to us with any questions that may come up! Happy Door Installations!