How to Use
Door Level Installation Instructions
Click the button below to follow this easy PDF step-by-step tutorial to see how to use our door levels
Please allow extra time for this large .pdf file to load (3.6MB).
CHEATAH Installation Instructions
Follow this easy step-by-step tutorial to see how to use our CHEATAH door level!
START HERE
Before you start, be sure to measure the OUTSIDE of the Door Frame and the rough opening (RO) to make sure the new door will fit. The RO should be 3/8” taller and 3/4” wider than the door frame. The rough opening needs to be SQUARE.
IT’S IMPORTANT TO FIX ANY RO PROBLEMS BEFORE YOU START!
You can visit www.JenTraTools.com/category/doors-101/ to learn more about fixing your rough opening.

This PATENTED feature allows our tool to fit on BOTH 1-3/8” and 1-3/4” thick doors (interior and exterior.)
Our parts are constructed from DuPont’s ZYTEL nylon resin and are tough enough for any job. We also offer a 100 day satisfaction or replacement guarantee on all tools we sell.
-
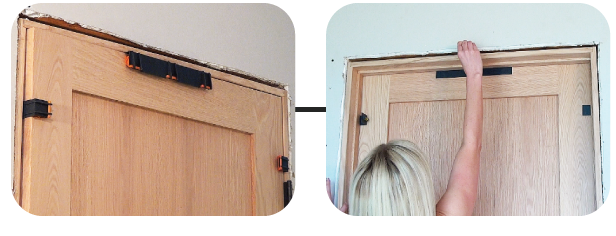
Step 1. Place the Prehung Unit Into the RO and Open the Door Past 90°.
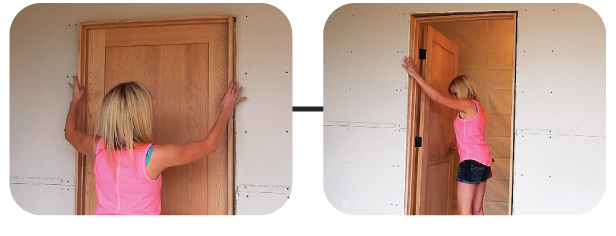
The door slab will act like a kickstand to prop the frame up.
-
Step 1 Continued
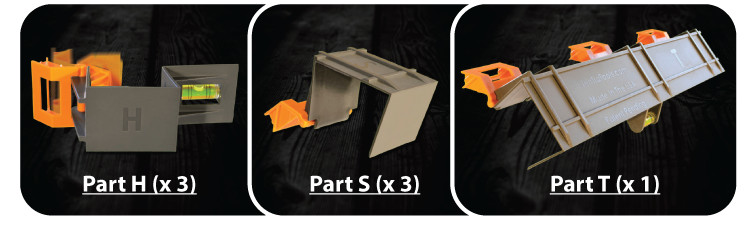
Next, place the 3 parts labeled H at each door hinge and put Part T onto the top of the door. Place each Part S on the strike side of the door directly across from each Part H. The Orange Spacer should ALWAYS be on the hinge-pin side of the door.
-
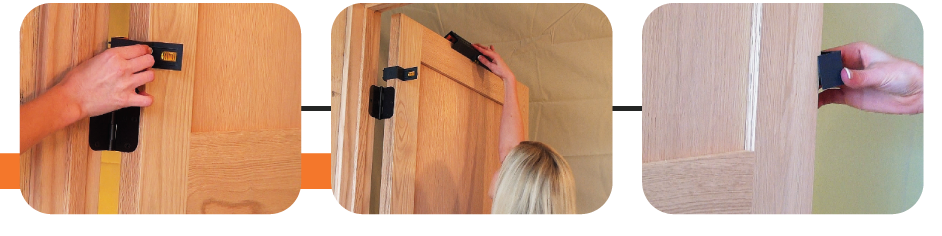
Step 2. Line the Door Frame Up with the Rough Opening
WITH THE DOOR OPEN, pull the frame back into the RO. Use the levels on Parts H and T to ensure the door is LEVEL and PLUMB before fastening.
-
Step 2 Continued

START AT THE TOP and work your way down the door – shimming and fastening at each hinge location. Take great care at this point that ALL levels read correctly before moving to next step. This is CRUCIAL to achieve an accurate install.
-
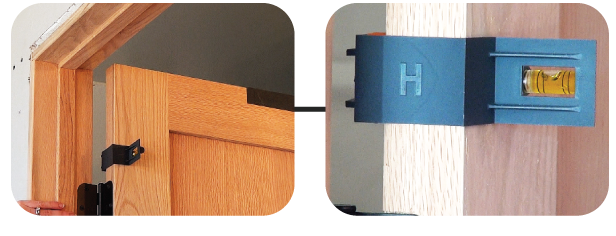
PRO TIP 1 - Shimming the Hinge Side
Shim with the thick portion facing the hinge-pin. This prevents the door from binding when shut. Also, use the long hinge screws provided with the door hinges NOW to prevent over-tightenting them later.
-
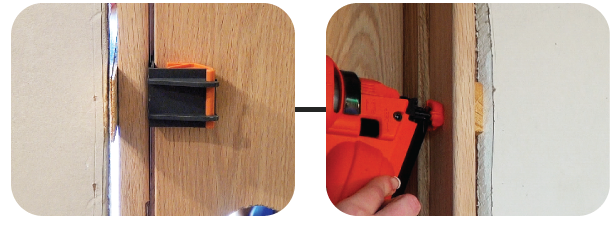
Step 3. GENTLY Pull the Door Slab Shut.
The parts’ built-in shim pads will help guide the door into the frame. Next, insert shims snugly above Part T. All leveling parts are designed to act as spacers between the door and the jamb.
-
Step 3 Pictures Continued

Fasten through the jamb when ready. Notice how you can easily slide Part T along the top of the door allowing you to place shims where needed.
-
Step 4. Shim the Remaining Locations
WITH THE DOOR SHUT, start at the top and shim at the 3 remaining parts S until the shims feel snug. The shim pads will help keep you from putting your shims in too far. When you’re ready, fasten through the jamb at each part. Again, the parts can slide up and down if needed.
-
Pro Tip 2 - What Fasteners to Use

It’s a good idea to only use nails as a secondary fastener. Your prehung door carries too much weight. Screws are recommended to fasten the hinge-pin side of the door frame. Nails on thier own will cause the door to sag and operate improperly.
-
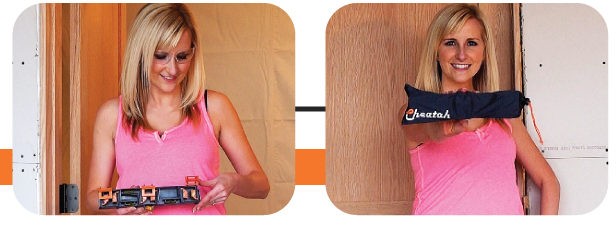
Step 5. Remove the Parts for Next Time
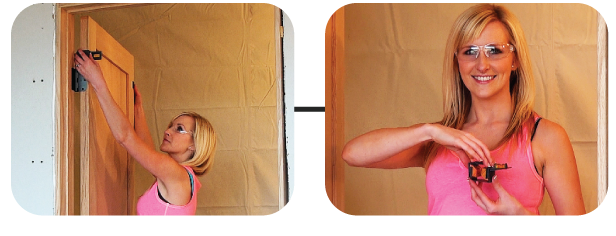
Open the door and remove all CHEATAH parts. Parts H and S are designed to fit compactly together inside of Part T. Be sure to keep your tool ready for its next use inside the provided micro-carrying bag!
-
The CHEATAH Door Level Works On:
Commercial and Residential doors – Single or Double doors – BOTH Inswing and Outswing doors – Doors with Sidelights or Transoms – Doors with Applied Casing – even Split Jamb doors!
Our Cheatah door installation level is used by homeowners, renovators and professional contractors and can save time and money. You can attach the tool to any type of door and easily see the level and plumb, which eliminates the frustration of aligning and realigning. We make it easy to hang a door so that it can be installed right the first time, every time. Every Cheatah door installation level is protected by our 100 Guarantee ™.
Our Cheatah door installation level is used by homeowners, renovators and professional contractors and can save time and money. You can attach the tool to any type of door and easily see the level and plumb, which eliminates the frustration of aligning and realigning. We make it easy to hang a door so that it can be installed right the first time, every time. Every Cheatah door installation level is protected by our 100 Guarantee ™.
fatbeurette.over-blog.com
Made for beginners to seasoned professional builders, it s the easiest door install method ever conceived.